Problem with embeds
This poses a significant performance issue, particularly when the embed isn’t immediately visible on the page. And I’m not just referring to CodePen and CanIUse; this applies to any third-party embed on the page.
While CodePen offers some optimization options, such as using the Click-to-Load feature on an embed or employing the loading="lazy" attribute on an iframe to defer the load, further optimization is still possible.
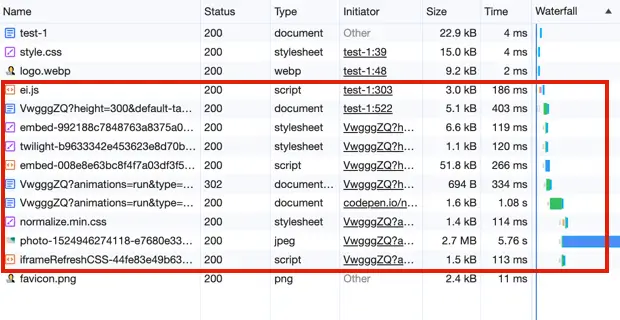
The number of resources loaded depends on the content of an embed, and in some cases, it can be substantial, such as numerous and/or large images.
These resources are deemed render-blocking, implying that loading them during the initial page load significantly impacts the page’s speed, a critical aspect of web page performance.
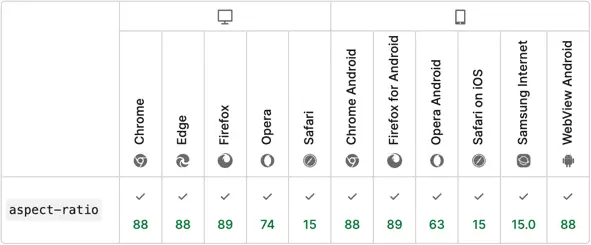
I’ve encountered this issue for some time, as I incorporate many of these embeds on my blog to showcase my work and offer information about browser support for a feature.
Solution is to lazy load
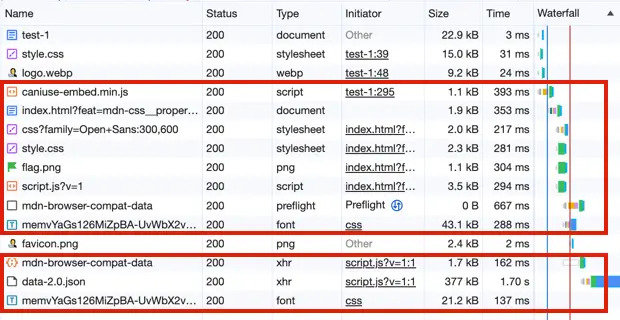
I decided to write a custom script to lazy load these embeds and optimize my blog posts for load speed.
The solution is quite simple: utilize the Intersection Observer API to determine if the embed is sufficiently close to the edge of the screen to initiate resource downloading.
The first step involves pasting the embed HTML code, but excluding the script tag. The script contains code to fetch the necessary resources for the embed.
So in case of CanIUse, the HTML will appear as follows:
<p style="background:pink;padding:50px 0;" class="ciu_embed" data-feature="mdn-css__properties__-webkit-text-stroke-width" data-periods="future_1,current,past_1" data-accessible-colours="false">
  Data on support for the <a href="https://caniuse.com/text-stroke" target="_blank">-webkit-text-stroke-width</a> feature across the major browsers
</p>
Next, we’ll need to write a small JavaScript snippet to properly handle embed lazy loading.
The following JavaScript code will verify if the embed element is within 400px of the edge of the screen and will then append the embed script to the body element, thereby triggering the resource download.
Below is my JavaScript snippet with comments for explanation:
// Get all CodePen and CanIUse embeds
const embeds = document.querySelectorAll(".codepen, .ciu_embed");
// Execute further code only if embeds exist on the page
if (embeds.length) {
// Set flags if resources for embeds are already loaded
let isCpLoaded = false;
let isCiuLoaded = false;
// Specify options for IntersectionObserver
// rootMargin is the top and bottom margin that represents
// the value to the edge of the screen of the embed
const options = {
root: null,
rootMargin: "400px 0px",
threshold: 0
};
// Create the Intersection Observer from the IntersectionObserver constructor
const intersectionObserver = new IntersectionObserver((entries, observer) => {
entries.forEach((entry) => {
// Ensure if the element is intersecting the edge of the screen
if (entry.isIntersecting) {
// Define the embed element
const embed = entry.target;
// Define the script source variable
let src = "";
// Based on the condition set the source variable equal to embed script path
// do it only once, because we don't need to run the code multiple times,
// once the resourses have already loaded
if (!isCiuLoaded && embed.classList.contains("ciu_embed")) {
isCiuLoaded = true;
src = "https://cdn.jsdelivr.net/gh/ireade/caniuse-embed/public/caniuse-embed.min.js";
} else if (!isCpLoaded && embed.classList.contains("codepen")) {
isCpLoaded = true;
src = "https://cpwebassets.codepen.io/assets/embed/ei.js";
}
// Execute further code only if the script source is available
if (src) {
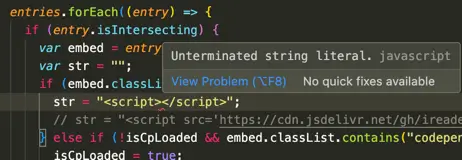
// Create a script element and assign src and async attributes
var script = document.createElement("script");
script.src = src;
script.async = true;
// Append the script before the closing body tag
document.body.appendChild(script);
// For the CanIUse embeds run additional code
if (embed.classList.contains("ciu_embed")) {
// CanIUse embed script is wrapped inside a "DOMContentLoaded" event
// so we need to trigger this event oursevles in order for the script to execute
// NOTE: trigger this event at your own risk,
// because many JavaScript libraries rely on this event
// and it might produce an unwanted results.
script.onload = function(params) {
var customEvent = new CustomEvent("DOMContentLoaded");
document.dispatchEvent(customEvent);
}
}
}
}
})
}, options);
// Call observer for each embed
embeds.forEach((embed) => {
intersectionObserver.observe(embed);
});
}