Text overflow ellipsis on select tag
For a better UI and appeal a CSS text-overflow property is used on a long piece of text. I’m going to show how to apply that to a select tag.
By default select tag will handle overflowing text pretty decently, depending on the browser.
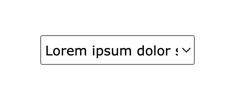
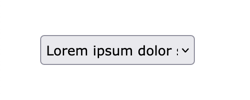

However, instead of just cutting out a text in the middle and have some consistency across browsers, lets give it custom styling by truncating the text.
Definitions
Before we move on it’s important to establish the starting ground in order to understand the issue and a solution to it.
As for the select tag, the HTML specs says:
Theselectelement represents a control for selecting amongst a set of options.
—html specs
The MDN on styling the select element:
Theselectelement is notoriously difficult to style productively with CSS.
—MDN
Also MDN on the text-overflow property itself:
Thetext-overflowCSS property sets how hidden overflow content is signaled to users. It can be clipped, display an ellipsis ('…'), or display a custom string.
—MDN
💡 NOTE: The text-overflow property applies to block container elements.
So we have a unique form element that is hard to style and the question is - how does one apply the text-overflow property to a select tag and handle text overflow? The answer is with a little bit of HTML and a sprinkle of JavaScript.
The main idea is to get the value of the select tag and store it in the data attribute of the container element. Then display it with the help of CSS.
Markup
First things first, to display the ellipsized text we’re going to need a container element. This element will wrap the select element and display the current value that the select element has. To do so, the data attribute must be declared.
Also, I’m going to set one of the option tags with a long value, to make sure it overlaps the select tag.
The end HTML code will look as follows:
<div class="select-container" data-content="">
  <select class="select" id="words">
    <option value="lorem ipsum dolor sit amet">Lorem ipsum dolor sit amet</option>
    <option value="lorem">Lorem</option>
    <option value="ipsum">Ipsum</option>
    <option value="dolor">Dolor</option>
    <option value="sit">Sit</option>
    <option value="amet">Amet</option>
  </select>
</div>
Styles
Next, we’re going to add some styles. Since the .select-container element is going to display the value we need to hide the actual select tag content and some of the original appearance.
Then we’ll add a custom arrow as a background and set padding.
.select {
  color: transparent;
  appearance: none;
  padding: 5px;
  background: transparent url("https://cdn4.iconfinder.com/data/icons/ionicons/512/icon-arrow-down-b-128.png") no-repeat calc(~"100% - 5px") 7px;
  background-size: 10px 10px;
}
For the wrapper element, we’ll set the position and display property. The main trick is the ::before pseudo element which will have the content property equals to a data attribute. This way the content of the pseudo element will always be equal to whatever value the data stores.
Since the pseudo element is going to store and display the value, we’re going to set the necessary CSS properties to ellipsize text white-space, text-overflow and overflow.
.select-container {
  position: relative;
  display: inline-block;
}

.select-container::before {
    content: attr(data-content);
    pointer-events: none;
    position: absolute;
    top: 0;
    right: 10px;
    bottom: 0;
    left: 0;
    padding: 7px;
    font: 11px Arial, sans-serif;
    white-space: nowrap;
    text-overflow: ellipsis;
    overflow: hidden;
    text-transform: capitalize;
  }
To give your select tag a unique and consistent look across all browsers check out my article where I explain in detail how to style select tag with pure css.
Script
Finally, we’ll need a few lines of JavaScript to respond to select element value change and setting the value to a container element data attribute.
Define two variables containing the select element and its container. Set initial values to the select element and container’s data attribute. And lastly, add an event listener to a select element.
const selectContainer = document.querySelector(".select-container");
const select = selectContainer.querySelector(".select");

select.value = "lorem ipsum dolor sit amet";
selectContainer.dataset.content = select.value;

function handleChange(e) {
  selectContainer.dataset.content = e.currentTarget.value;
}

select.addEventListener("change", handleChange);
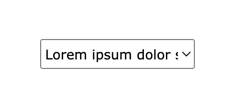
Demo
You can find the end result I’ve made on Codepen:
See the Pen Text-overflow ellipsis on Select tag hack by Nikita Hlopov (@nikitahl) on CodePen.