Syncing custom TinyMCE and Quicktags editors for instant update
When implementing an instant update preview area with the WordPress Classic Editor, an appearance issue arises when working in different modes. This problem, its causes, and the solution are explained below.
Problem
When utilizing the WordPress Classic Editor for implementing an instant update of a specific preview area, the content renders differently based on the editing mode.
This discrepancy arises because the Classic Editor in WordPress has two modes, each with a separate text editor:
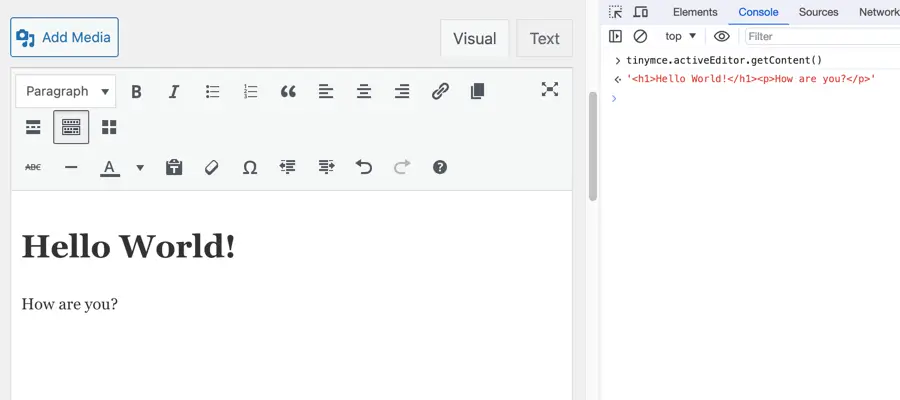
- Visual mode uses the TinyMCE editor
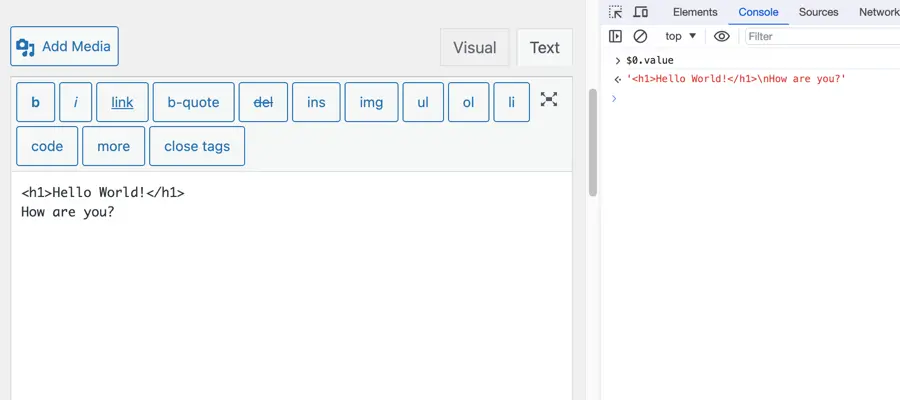
- Text mode uses the Quicktags editor

TinyMCE is a WYSIWYG editor that produces ready-to-use HTML code, while the Quicktags editor is a simple text editor allowing users to manually insert HTML tags.
💡 NOTE: As of time of writing this article the WordPress was using a version 4.9.11 of TinyMCE editor.
On the other hand the Quicktags editor is a simple Text editor, which allows users to insert HTML tags manually.
The issue occurs when switching between modes, leading to potential stripping of changes, such as tags, from the Quicktags editor. This can result in undesired outcomes when instantly outputting content to a designated area, as the HTML differs.
Notably, this is visible for text content, displayed as paragraphs in Visual mode and as regular text in Text mode.
How it works in WordPress
In the WordPress View page, there is no visible difference; the output text appears exactly as it does in the TinyMCE (Visual mode), even if edited in the Quicktags editor (Text mode).
This consistency is achieved through the application of the wpautop function, which wraps text inside a p element after saving or publishing a post.
Solution
When creating a custom text editor in WordPress, such as in a plugin, and aiming to mimic its logic, synchronization of values in both editor modes is necessary.
Assuming the Classic Editor is initialized with both modes, here’s how to sync the values:
You can store the value of the editor in a variable, since the TinyMCE is the default one, you can get its value and store as a default:
let editorValue = window.tinymce.activeEditor.getContent()
The editorValue variable will hold the editor value, which you can use to insert in a live preview area. E.g.:
const preview = document.getElementById('preview')

preview.innerHTML = editorValue
The TinyMCE will have its own change handler function which you can specify when initializing. Inside the change handler function you should write the TinyMCE editor’s value to the editorValue variable.
const id = 'editor'
let editorValue = window.tinymce.activeEditor.getContent()

window.tinymce.init({
  id: id,
  selector: '#' + id,
  setup: function(editor) {
    editor.on('keyup change undo redo', (e) => {
      editorValue = editor.getContent()
    })
  }
})
For the Quicktags editor, we need to add an eventListener, and run the value of the textarea through the wpautop function.
Since WordPress has only a PHP version of the wpautop function, we can use a JavaScript version of the this funciton.
You can install it as an npm package or copy paste it from GitHub.
import wpautop from 'wpautop'

const id = 'editor'
let editorValue = window.tinymce.activeEditor.getContent()

window.QTags.instances[id].canvas.addEventListener('keyup', (e) => {
  const formattedValue = wpautop(e.target.value)
  editorValue = formattedValue
})
Now, the content value is stored in one place, ensuring consistency between the editor modes. This prevents visual artifacts and glitches when working in both modes.