Understand the difference between Margin vs Padding in CSS? [+Demo]
Beginner developers often get confused between margin vs padding properties in CSS. They both create the space around the element. But how are they different? What are the use cases? This guide will answer those questions for you.
The difference explained in short:
The padding is the space inside the element, that separates the content from the border.
The margin is the space outside the element, that separates it from other elements.

The image above highlights the button’s padding area in green and the margin area in orange.
Try out an interactive demo to see how margin vs padding works.
Page contents [show]:
CSS Box model
To understand the difference between margin and padding, you need to understand the box model concept first.
The point is that each HTML element is rendered in a browser as a box, that consists of four parts:
- Content area;
- Padding;
- Border;
- Margin.
Each part is bound by the respective edge:
- content area edge
- padding edge
- border edge
- margin edge.
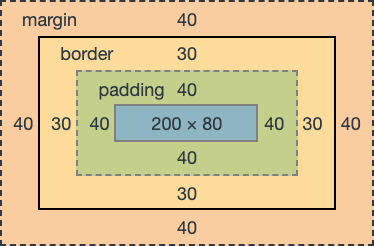
Thus the box model makes padding and margin both a part of the element. And they both directly affect the appearance of one.
Margin and padding have several features that make them different. Knowing these features will help you better understand their behavior and proper usage.
The following sections will break down each feature of both margin and padding.
Margin
The margin area, bounded by the margin edge, extends the border area to include an empty area used to separate the element from its neighbors.
- MDN
The margin is a transparent space outside the element that separates it from other elements. Basically, it pushes the element away from other elements.
Margin features
The features listed below are only inherent to the margin.
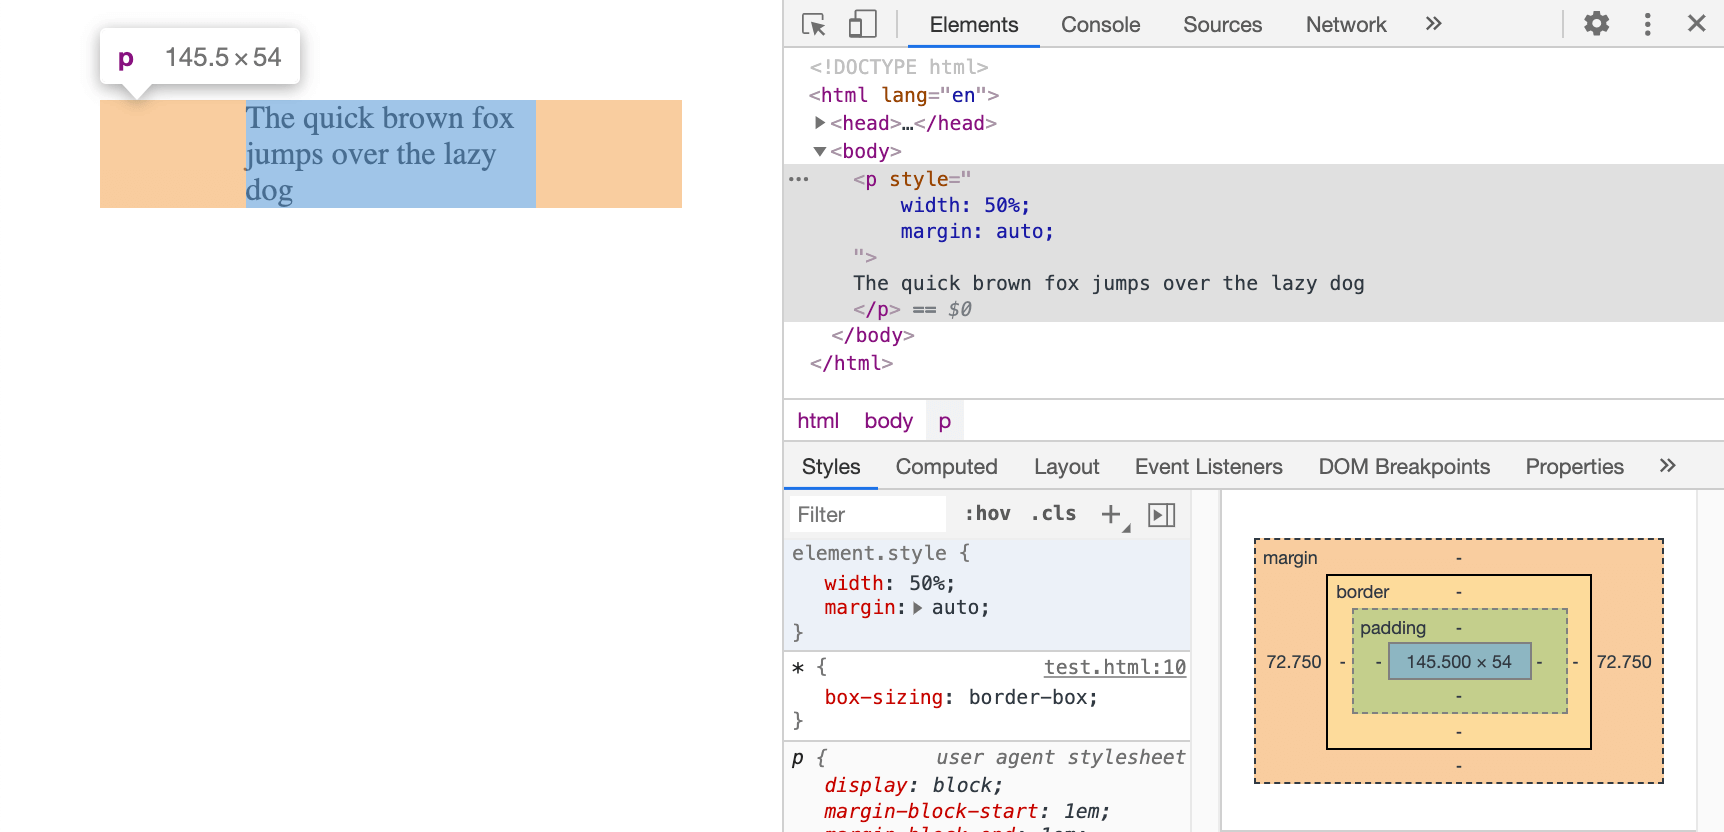
Can be auto
Margin value can be set to auto. This means that the browser will automatically define the margin value. Margin’s values will be split evenly, so they can be used to center an element.
p {
  width: 50%;
  margin: auto; /* this will center paragraph horizontally */
}
Result:
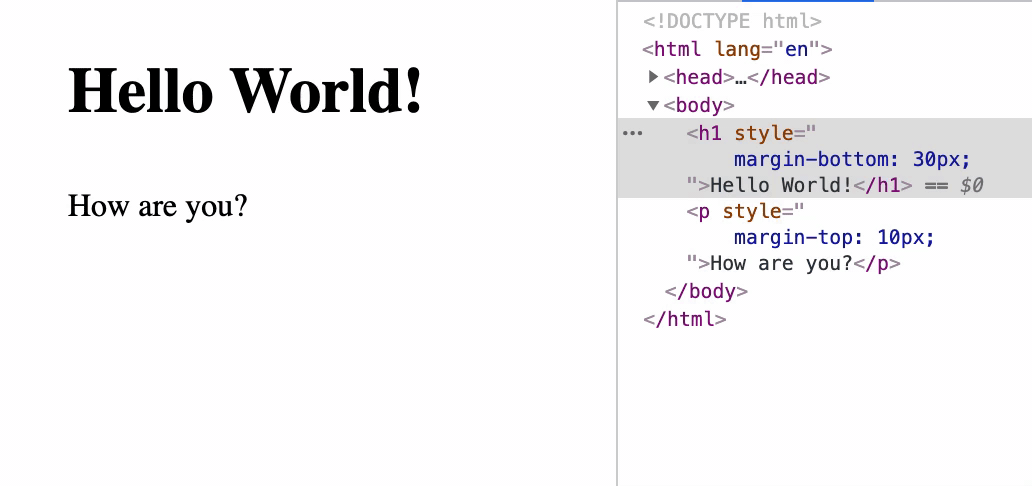
Collapsible margins
In some cases, margins may collapse into a single margin (one of the largest values or one of them if they’re equal).
So when two elements placed side by side or one after another, the margins will collapse. However not always. In some cases, both margins will be applied e.g. floats or absolutely positioned elements.
I highly recommend checking this great article on margin collapse by Josh W. Comeau.
In the example below, the space between h1 and p will be 30px. Margins collapsed and the greater value is applied.
<h1>Hello World!</h1>
<p>How are you?</p>
h1 {
  margin-bottom: 30px;
}

p {
  margin-top: 10px;
}
Result:
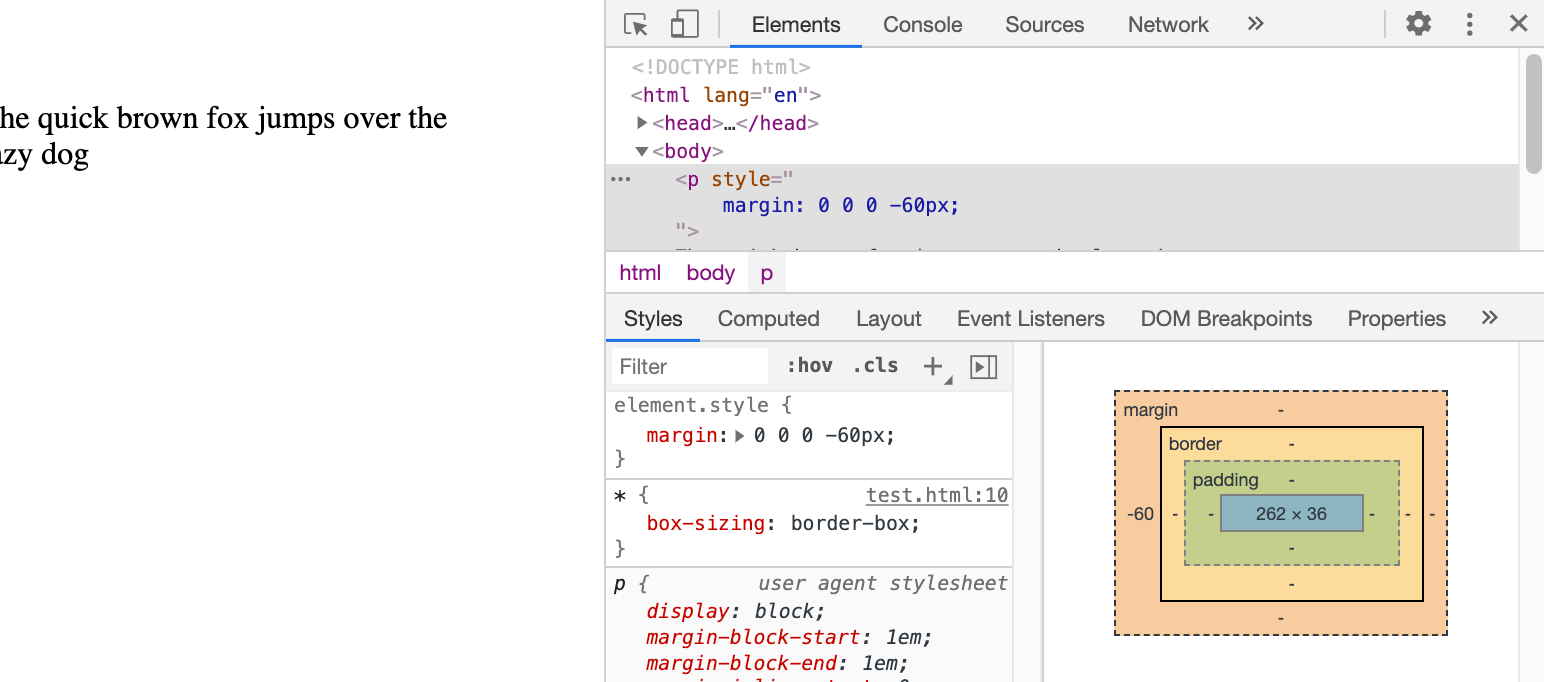
Can be negative
Margins may have negative values. It works sort of like positioning. The negative value will shift the element in an opposite direction.
In the example below the paragraph will be moved to the left by 60px.
p {
  margin: 0 0 0 -60px;
}
Result:
Cannot alter element size
Unlike padding, the margin cannot alter element size. If you recall the box model, the margin is “used to separate the element from its neighbors”. So no matter what value you set element size will remain intact.
When to use margin
Margins are generally used to set the space between elements (a “gap”) or to position elements. These powers come from the ability to set auto and negative values.
NOTE: The margin area is not clickable! Due to the fact that this is the empty area outside the element.
Padding
The padding area, bounded by the padding edge, extends the content area to include the element’s padding.
- MDN
The padding is the space between the actual content and the border of the element. It will have any background-color or backgorund-image property that has been applied to an element.
Padding features
The features listed below are only inherent to the padding.
Cannot be auto or negative
Unlike margin, the padding cannot have auto or negative values. If you set auto or a negative value to padding it will not change the appearance of the element, however, in Element Inspector it will be shown as an Invalid property value.
Not collapsible
Since the padding is the space inside the element it cannot collapse.
Can alter element size
Paddings directly affect element size. Visually it can be seen well, especially if the background-color or border property is applied. But if you’re trying to get element size with JavaScript it depends on the CSS box-sizing property and the method you’re using.
You can check my article explaining how to get element size with JavaScript to avoid possible troubles.
When to use padding
Use it to give your elements a visually appealing appearance. Also, additional paddings increase element size, which is quite useful from the UX and Accessibility perspective. E.g. on mobile devices, it is easier to tap a button or an input field that has some paddings. They make elements bigger in size, thus easier to tap.
With the help of padding, you can give your element an aspect ratio. It is called the “padding hack” and is used to maintain the proportions of the element throughout the viewports.
Margin and Padding shorthand syntax
Both padding and margin properties have a shorthand syntax. There are four ways you can set these properties.
single value - sets top, right, bottom, and left margins:
p {
  margin: 10px;
}
two values - the first one sets vertical (top and bottom), second sets horizontal (right and left) margins:
p {
  margin: 10px 20px;
}
three values - first and third sets top and bottom accordingly, the second one sets right and left margins.
p {
  margin: 10px 20px 15px;
}
four values - each margin side is set separately in the following order top, right, bottom, left.
p {
  margin: 10px 20px 15px 0;
}
Margin vs Padding Demo
Change input values to see how margin and padding properties change for the set of buttons.